Setup the environment
The "Onboard_D" agent requires both Microsoft 365 and Azure environments to be configured to work properly. Before using it, there is some setup to do.
For the purpose of the hackathon demo, the deployment and preparation is done manually. However, in a proper production scenario, all these steps would be automated.
⏱️Time required: 20 to 30 min (sorry for that, but good news, that is pretty straightforward)
Clone the GitHub repository
First, clone the GitHub repository from https://github.com/FranckyC/m365-ai-agents-hackathon-onboard_D
Create a new team in Teams
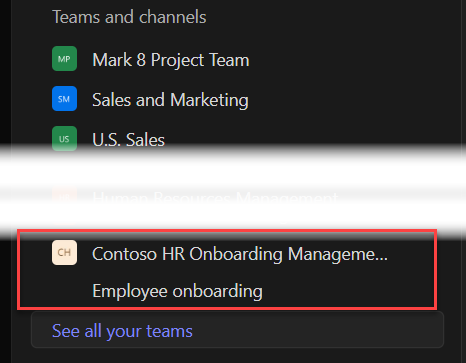
- Create a new Team Contoso HR Onboarding Management in Microsoft Teams with default Employee onboarding channel:
Setup Azure environment
1. Create a new Entra ID application
To consume the Microsoft Graph API to access Microsoft Planner and SharePoint data, you'll need to register a dedicated Entra ID application.
- Once created, generate a client secret. This one will be used in the agent configuration in the
SECRET_AAD_APP_CLIENT_SECRETvariable (env/env.local.userfile).
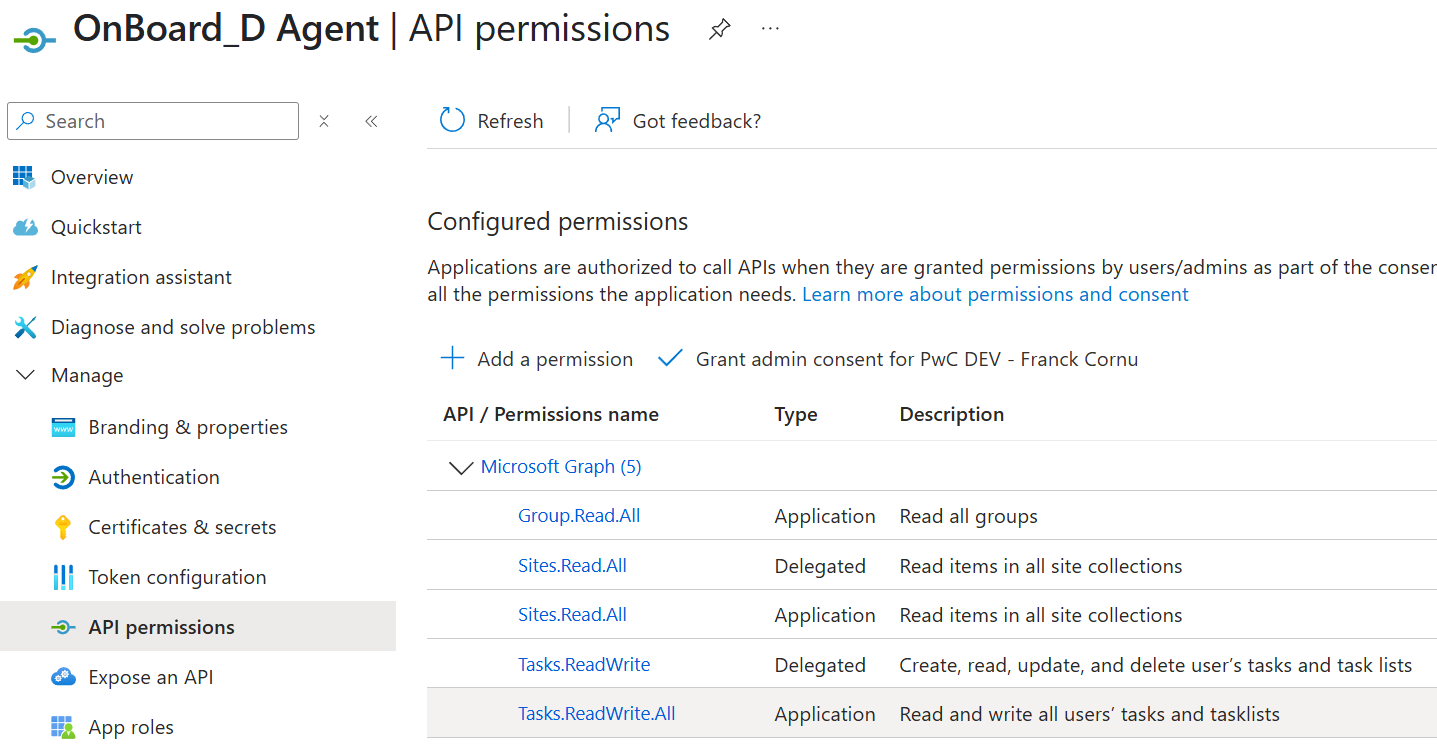
- Configure API permissions in the app. The following API permissions are used by the application.
| API permission | Type | Used for |
|---|---|---|
Tasks.ReadWrite | Delegated | Get and updates Planner tasks on behalf of the user. |
Sites.Read.All | Delegated | Get associated plan ID for the user. Could be restricted to Lists.SelectedOperations.Selected. |
Tasks.ReadWrite.All | Application | Get tasks for a user when notified automatically + Run the import-tasks.ps1 script to provision sample plan. |
Sites.Read.All | Application | Get associated plan ID for the user. Could be restricted to Lists.SelectedOperations.Selected. |
Group.Read.All | Application | Run the import-tasks.ps1 script to provision sample plan. |
Don't forget to grant admin consent.
2. Create Azure resources
Create a new resource group
Create a new Azure resource group.
Use North Central US region for resources for the purpose of the demo.
Create a new Azure OpenAI resource
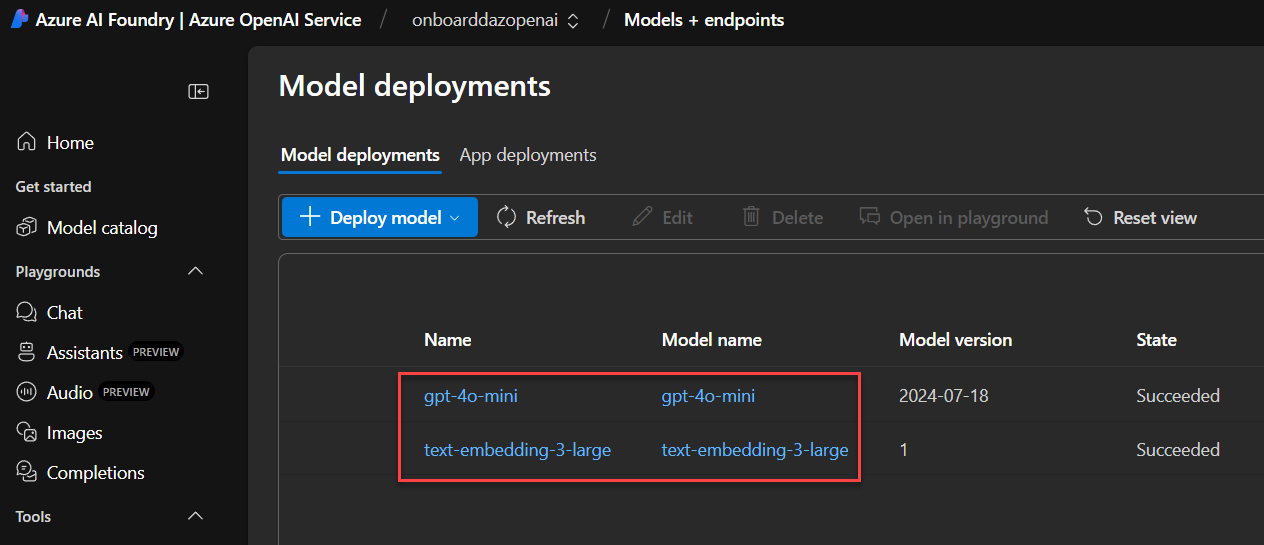
Once created, go to the Azure AI Foundry portal and create the following model deployments (use default model names for deployment names):
gpt-4o-mini. This model is used by the agent to answer user questions.text-embedding-3-large. This model is used to generate embeddings for Azure AI Search indexing.
Open any deployment and copy the following values information:
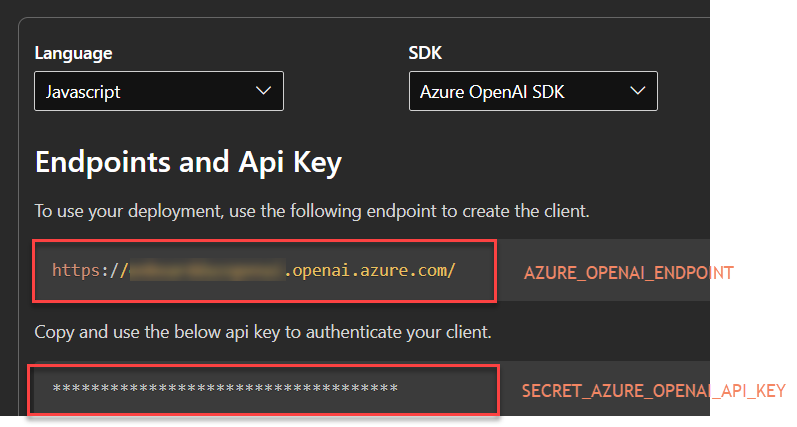
They will be used later in the agent source code respectively in the .env.local.user (SECRET_AZURE_OPENAI_API_KEY variable) and env.local files (AZURE_OPENAI_ENDPOINT variable)
Create a new storage account
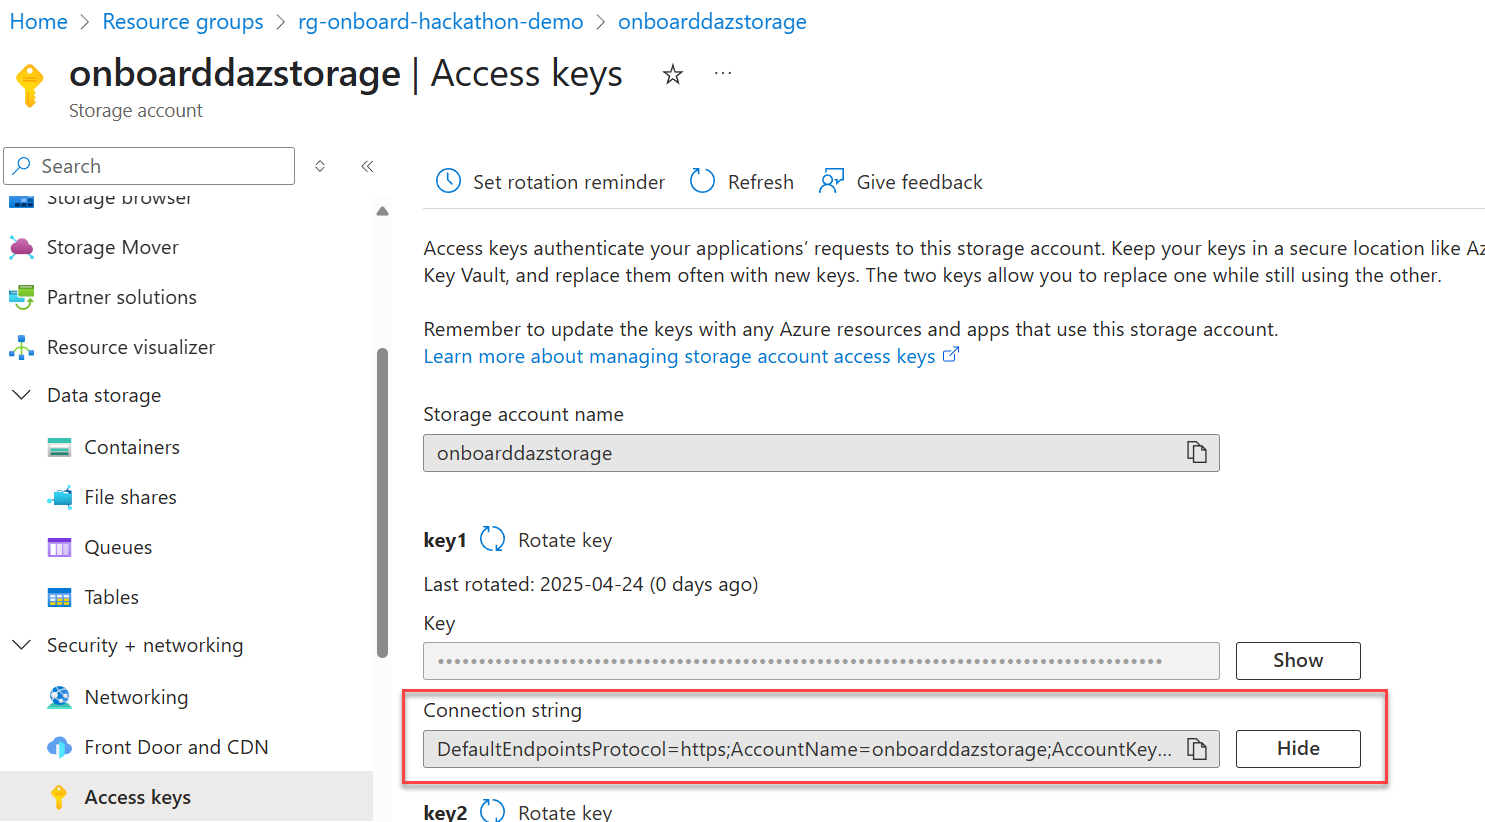
We use a blob container to store the bot state (i.e. user conversation) to be able to send targeted notifications (Use 'Azure Blob Storage or Azure Data Lake Storage Gen 2' as primary service + LRS redundancy).
Once storage account create, from the storage settings, copy the connection string. It will be used in the .env.local.user file as SECRET_BLOB_CONNECTION_STRING variable.
Create Azure AI Search
Use the F0 pricing tiers for demo purpose.
- Create a new index hrdocuments-index with following schema:
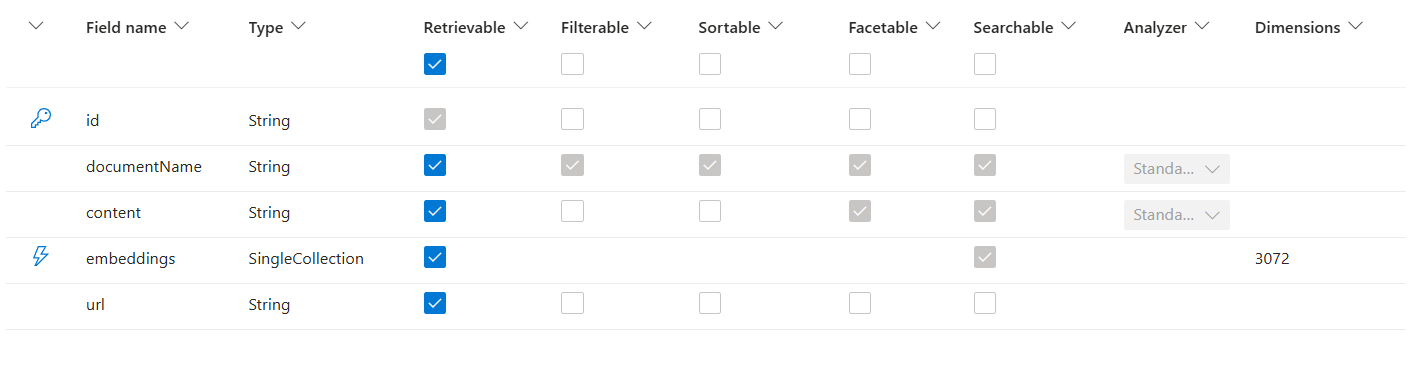
Pay attention to the fields properties (i.e. retrievable, searchable, etc.), especially for the content property). Once the index is created you can't change those unless your delete and recreate the index.
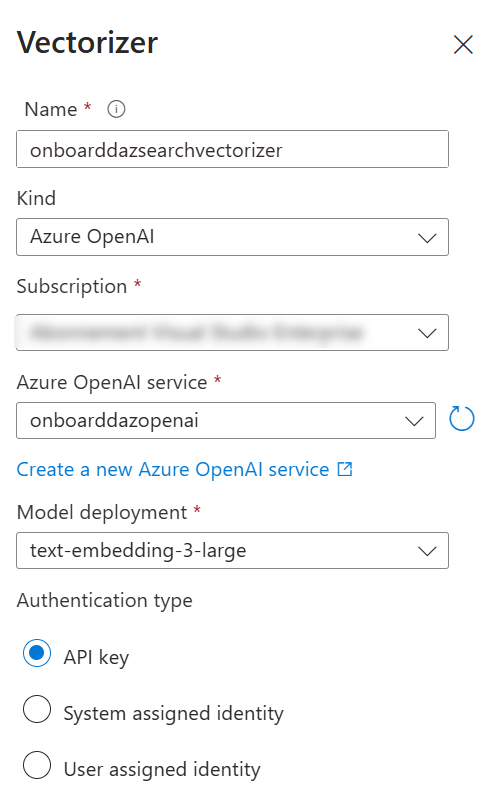
- For the embeddings field (Collection(Edm.Single)), create a new vector profile using default settings. For the vectorizer, use the Azure OpenAI resource created earlier with API key access and the
text-embedding-3-largemodel:
Do not create compression configuration.
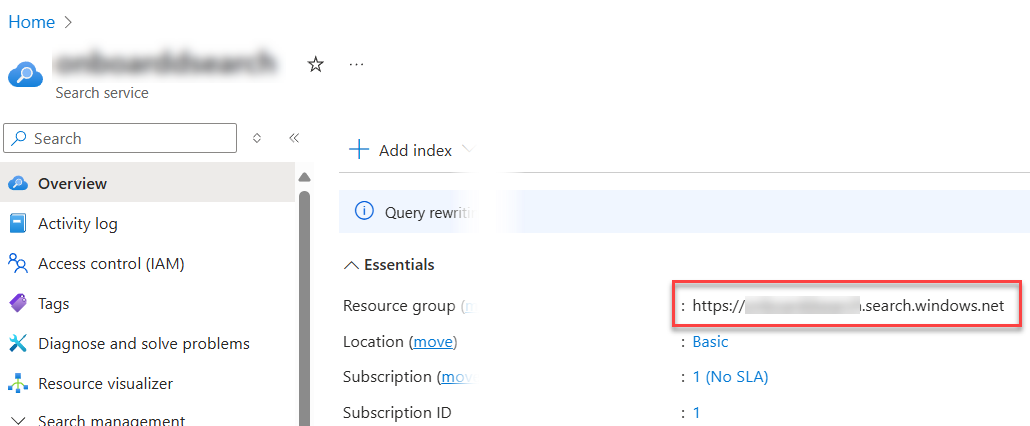
- Finally, copy the API Key value from the Keys settings. This value will be used in the
.env.local.userfile asSECRET_AZURE_SEARCH_API_KEYvariable.
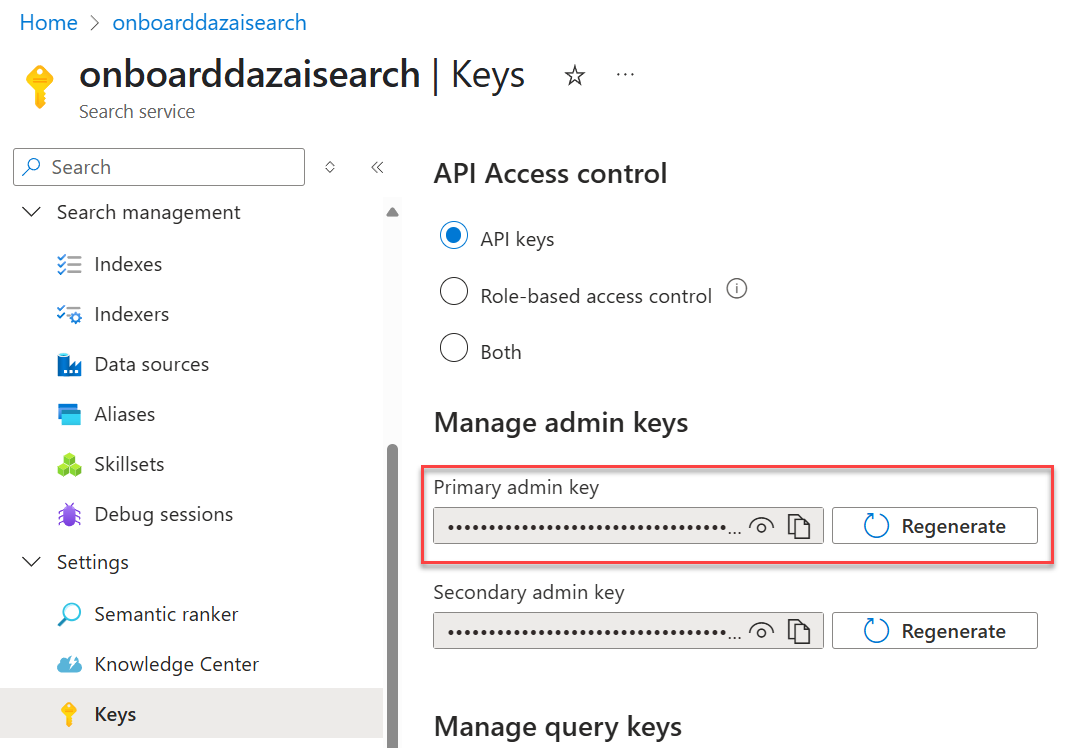
- Copy also the search instance URL. It will be used in the
AZSEARCH_ENDPOINTvariable.
Create the Logic App to index documents
- Create a new Logic App with "Workflow Service Plan". Use North Central US for the region.
- On the "Workflows" section, add a new workflow from template. Search for 'Azure AI Search' and choose SharePoint Online: Ingest and index files using Azure OpenAI and Azure AI Search - RAG pattern.
- Give the workflow a name and leave the 'Stateful' state type.
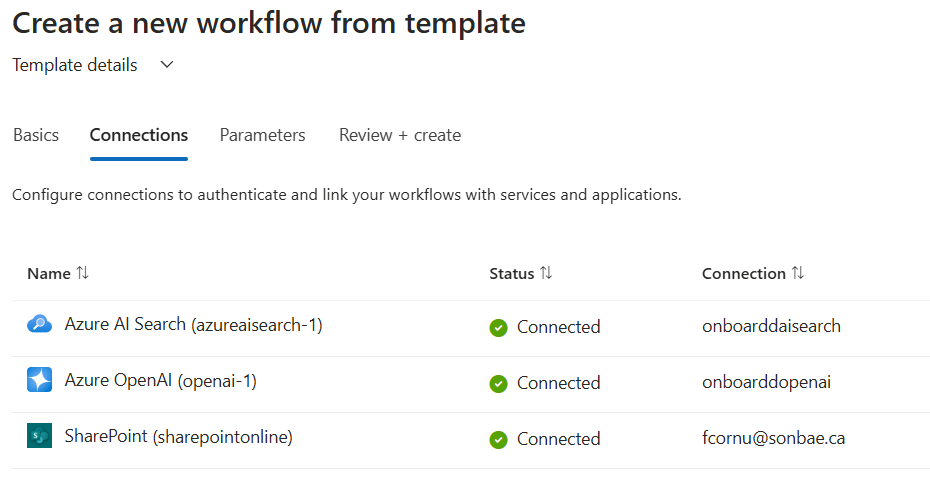
- Configure the connections according to resources created earlier (Azure AI Search via API Key, Azure Open by API Key and SharePoint Online):
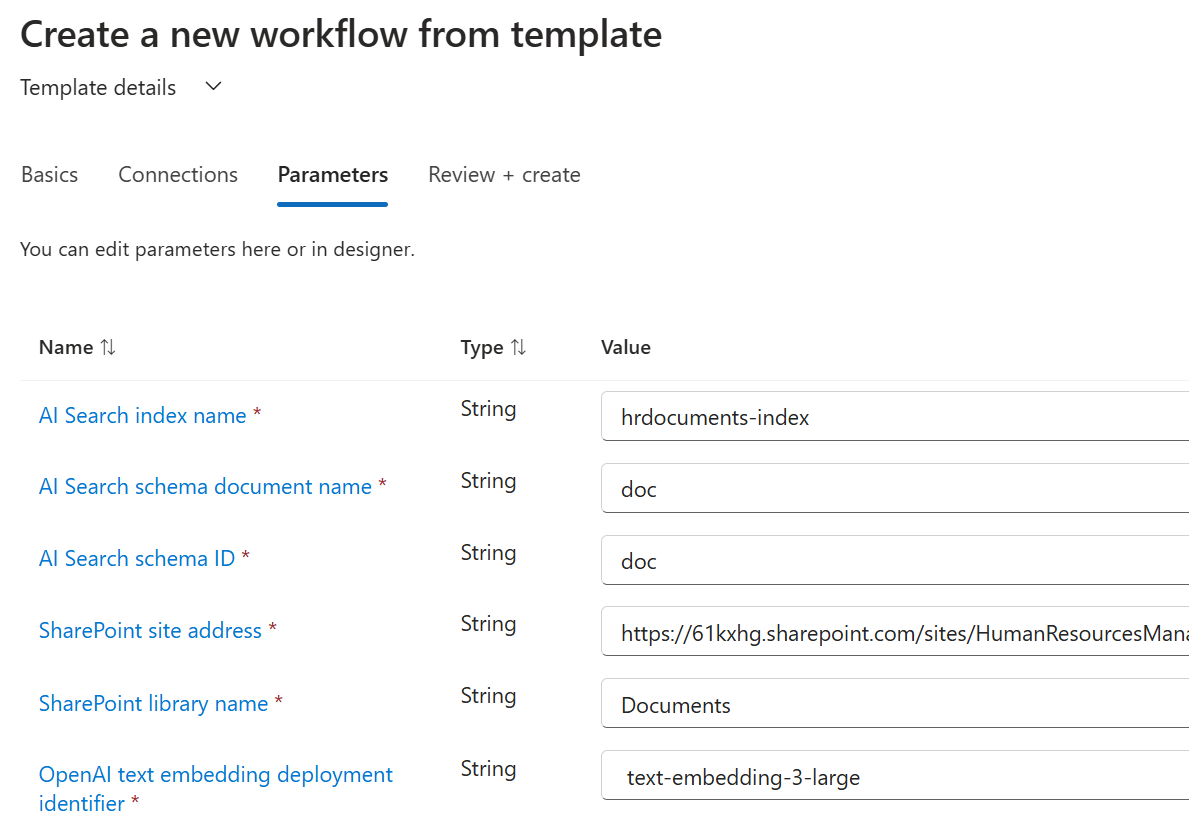
- Fill the parameters for the template as follow:
- Once the workflow created, open the designer and update the "Select embeddings and map to AI Search schema" action to add a new property 'url'. Use the formula
triggerBody()?['{Link}']as value:
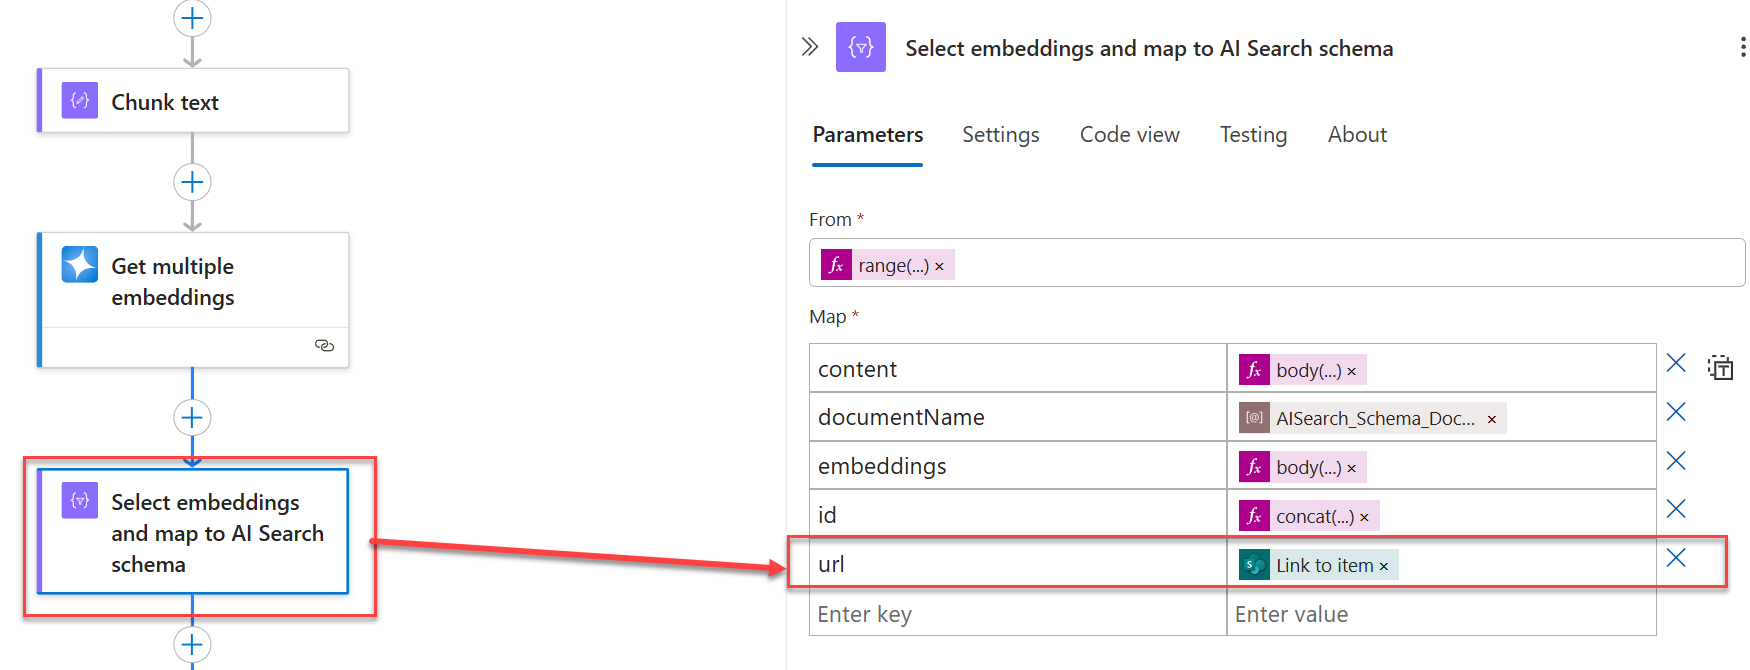
- Save the workflow.
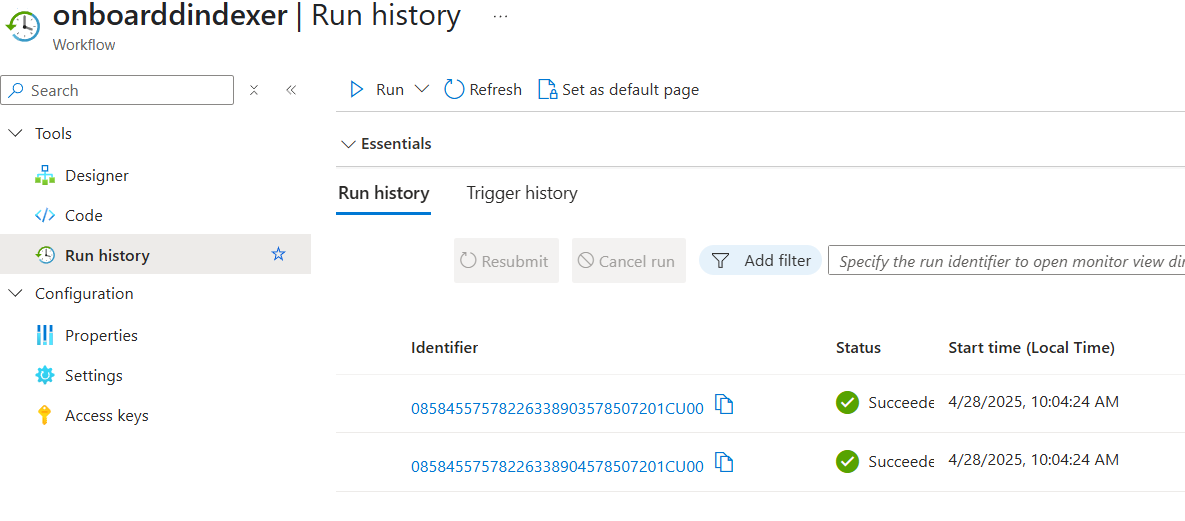
- In the 'Documents' library of the SharePoint site , upload the two sample documents provided from the folder
deploy/data. If your Logic App is correctly configured, documents should be indexed in Azure AI Search automatically when added.
Finalize setup for the Microsoft 365 environment
1. Create the employees onboarding list
In the SharePoint site associated to this team, create a new SharePoint list Employees Onboarding with the following columns (internal names are important here as they will be referenced in the agent code):
| Column internal name | Display name | Type |
|---|---|---|
contosoEmployeeName | Employee Name | Person or Group |
contosoEmployeeStartDate | Employee Start Date | Date |
contosoEmployeePlanId | Employee Plan ID | Text |
contosoEmployeedAadObjectId | Employee AAD ID | Text |
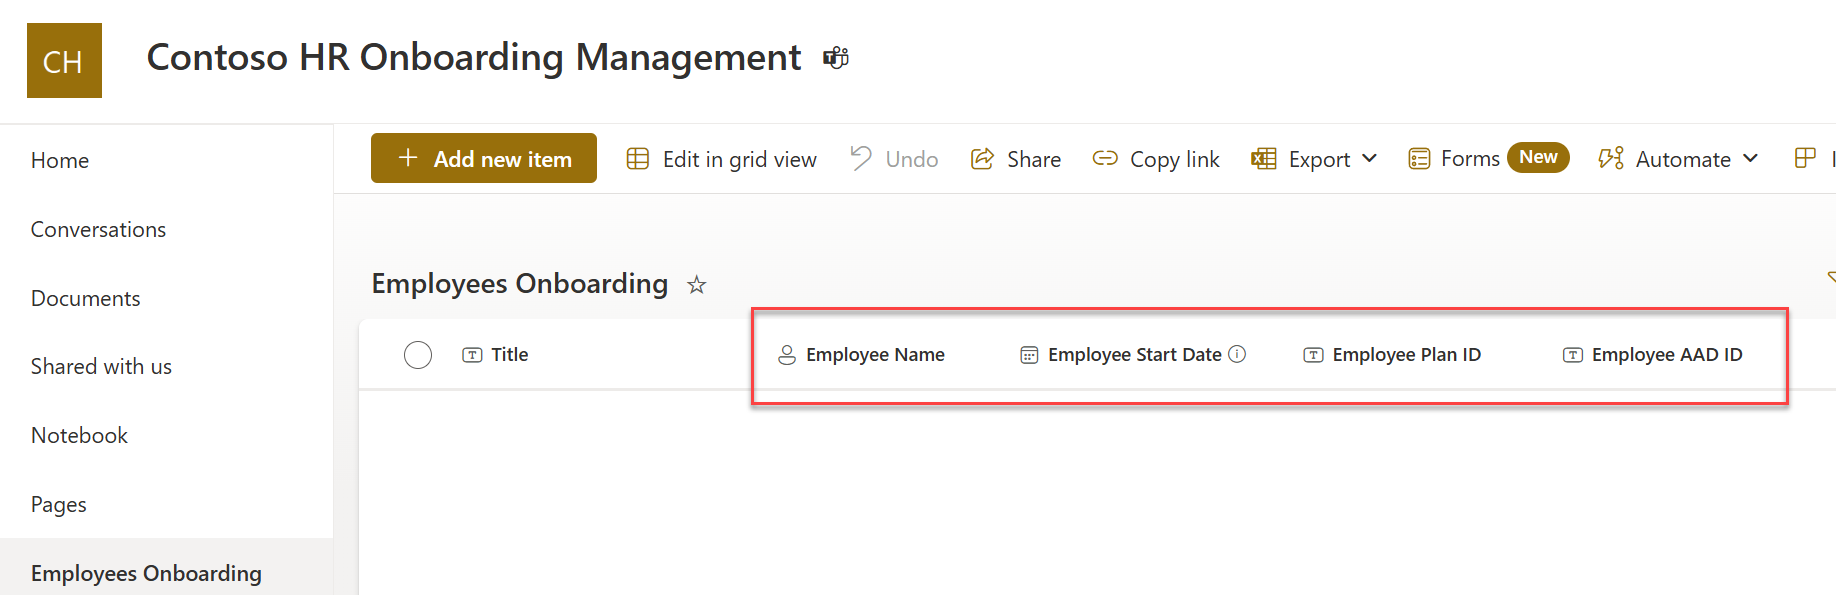
In SharePoint, column internal names are set at column creation. Once set, you are free to rename the column with a friendly name
2. Create a HR Onboarding template plan
Use the deploy/import-tasks.ps1 script to automatically import a sample Microsoft Planner onboarding plan in the Microsoft 365 group:
Install-Module Microsoft.Graph.Planner -Scope CurrentUser -Repository PSGallery -Force
$ClientId="{Client ID of the Entra ID app}"
$TenantId="{Tenant ID}"
$ClientSecret="{Client Secret of the Entra ID app}"
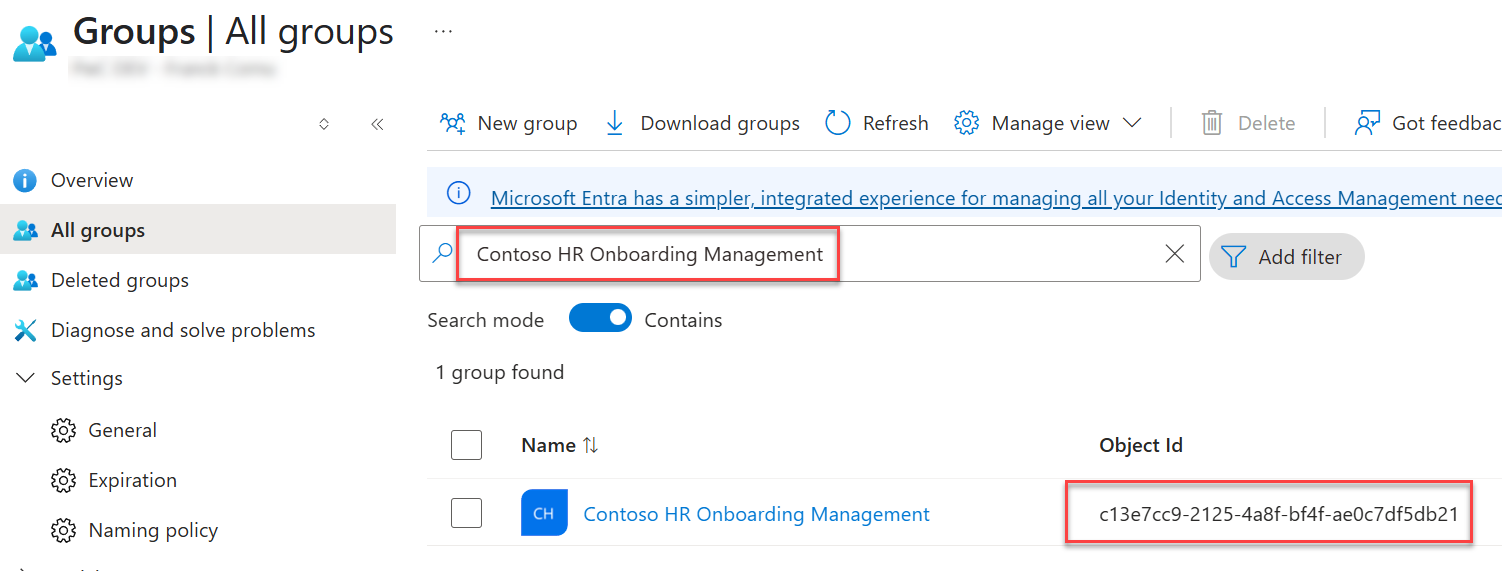
$GroupId="{ID if the Microsoft 365 group}"
.\import-tasks1.ps1 -clientID $ClientId -tenantID $TenantId -clientSecret $ClientSecret -csvfilepath "./data/tasks.csv" -PlanName "Contoso Employee Onboarding Plan" -GroupID $GroupId
- You should be owner of the group to run that command.
- Use the information from the Entra ID application created earlier (
ClientId,ClientSecret,TenantId) - You can get tehh group ID by search the group name in Entra ID:
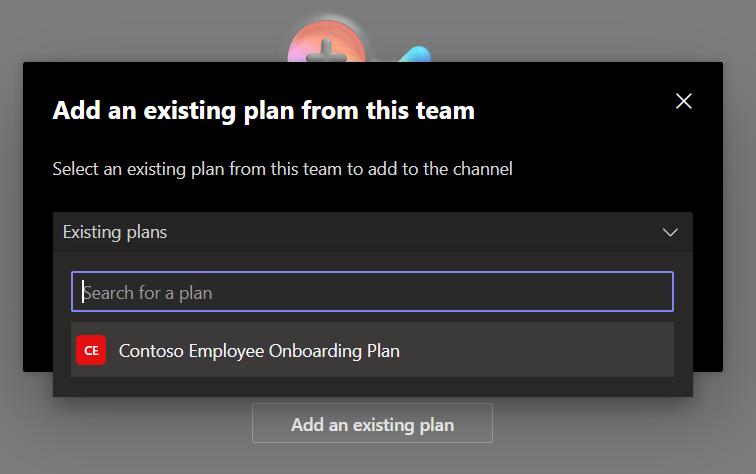
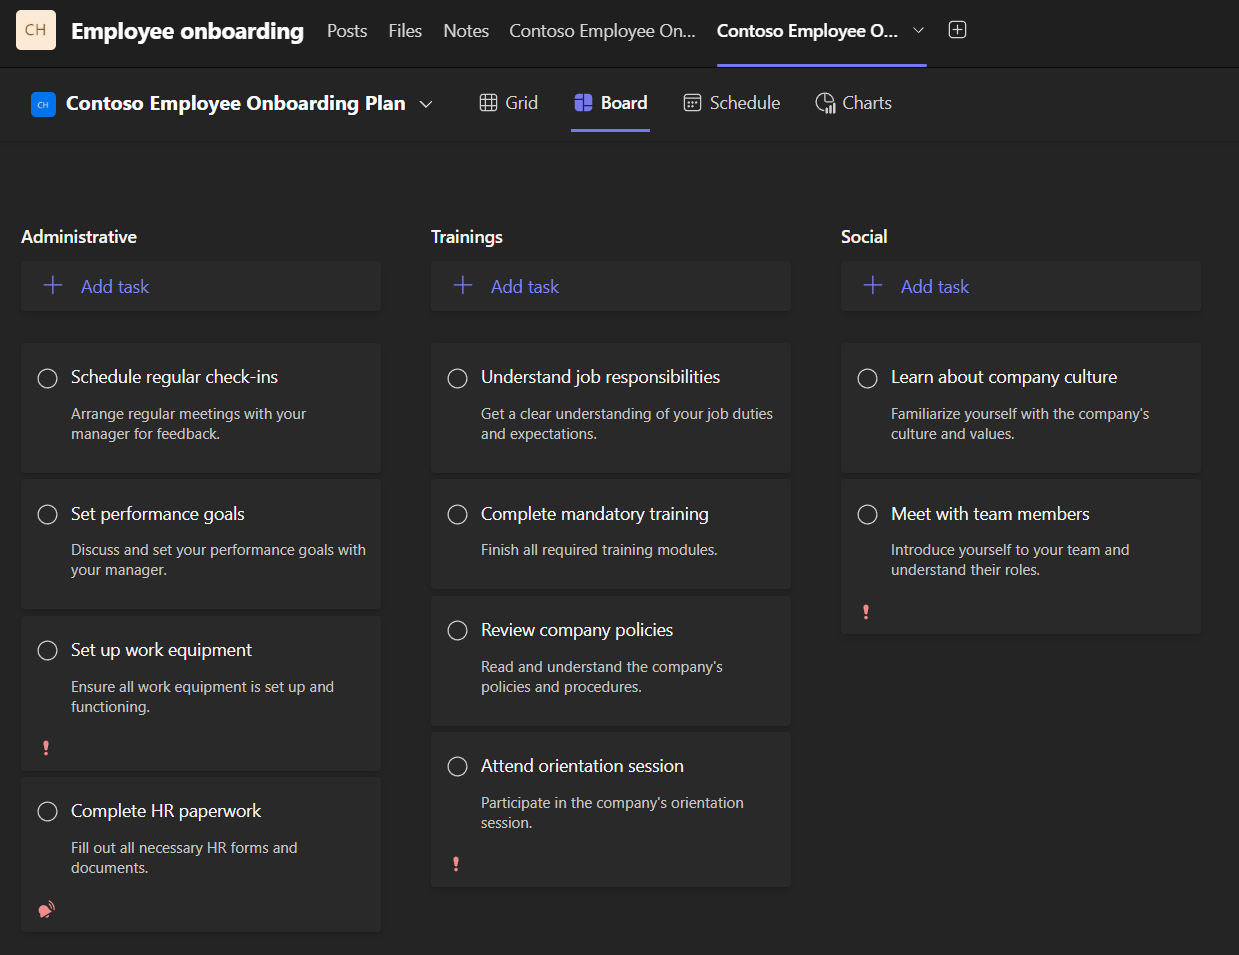
After the script completed, you can then add the plan to the team as a new tab:
3. Import Power Automate flows
For the purpose of this solution, and to make the deployment easier, we used Power automate with Premium connectors (i.e. HTTP).
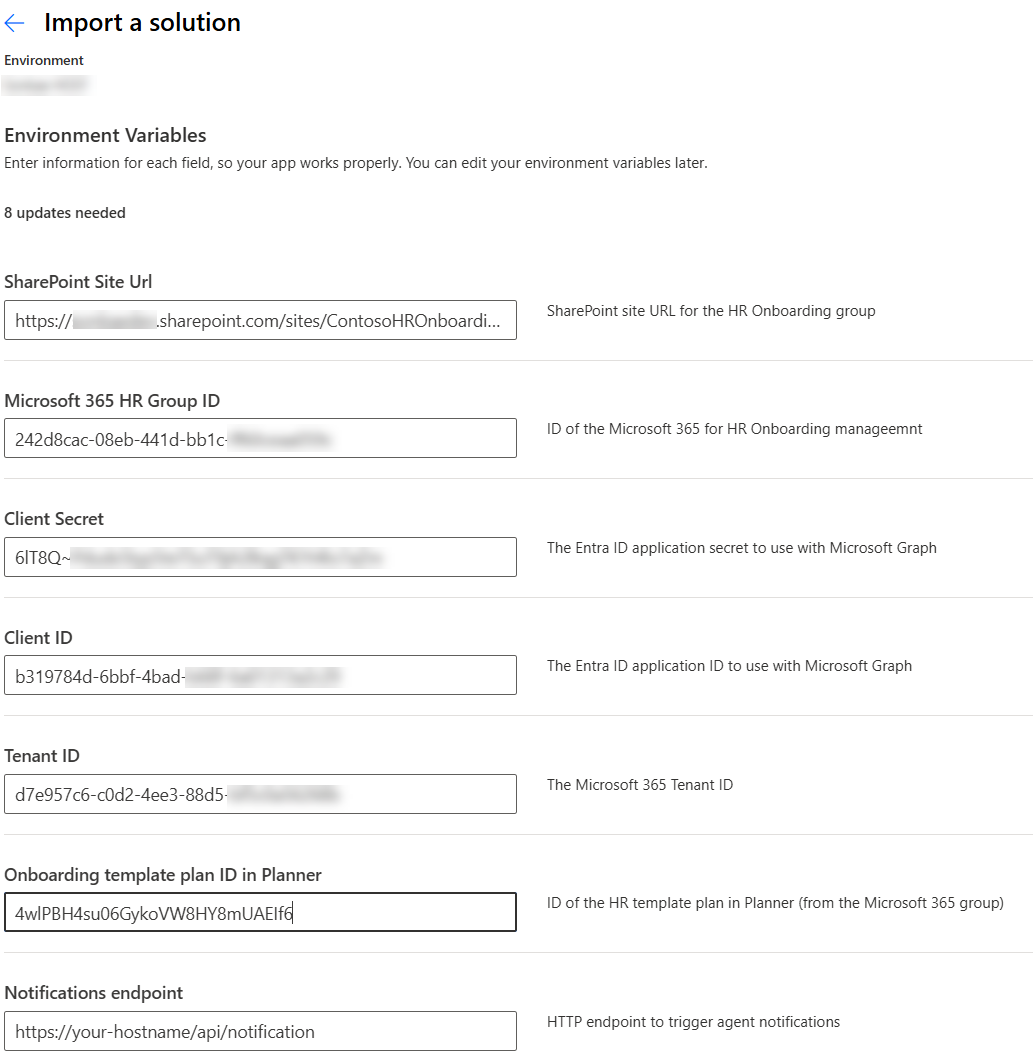
The Power Automate flow for new employee configuration is deployed as a Power Platform solution.
- Go to https://make.powerautomate.com/, choose the environment you want to use and then go to 'Solutions'.
- Import the
deploy/onboard_dNewEmployeeSetup.zipsolution file and click 'Next' (let 'Enable Plugin steps and flows included in the solution' option enabled). - Select "Review and adjust all connections" and configure connections according to your environment (SharePoint, Planner and Office 365).
- Fill the workflow paramaters according to your environment:
The Plan ID can be rereived directly from the URL when, from teh Team tab you select "Open in new window":
 Leave the 'Notifications endpoint' parameter untouched for now. This URL will be replaced by a DevTunnels temporary URL when testing the agent.
- Test the Power Automate by adding a new entry in the list for your account (employee name + start date, leave other fields blank). You should see the plan ID and AAD ID values populated automatically by the flow.

4. Link documents to task
To test the cross references retrieval from the agent using mutliple tools, you can link specific documents to a task. This way, the content of these documents will be considered when providing a summay of task to the user.
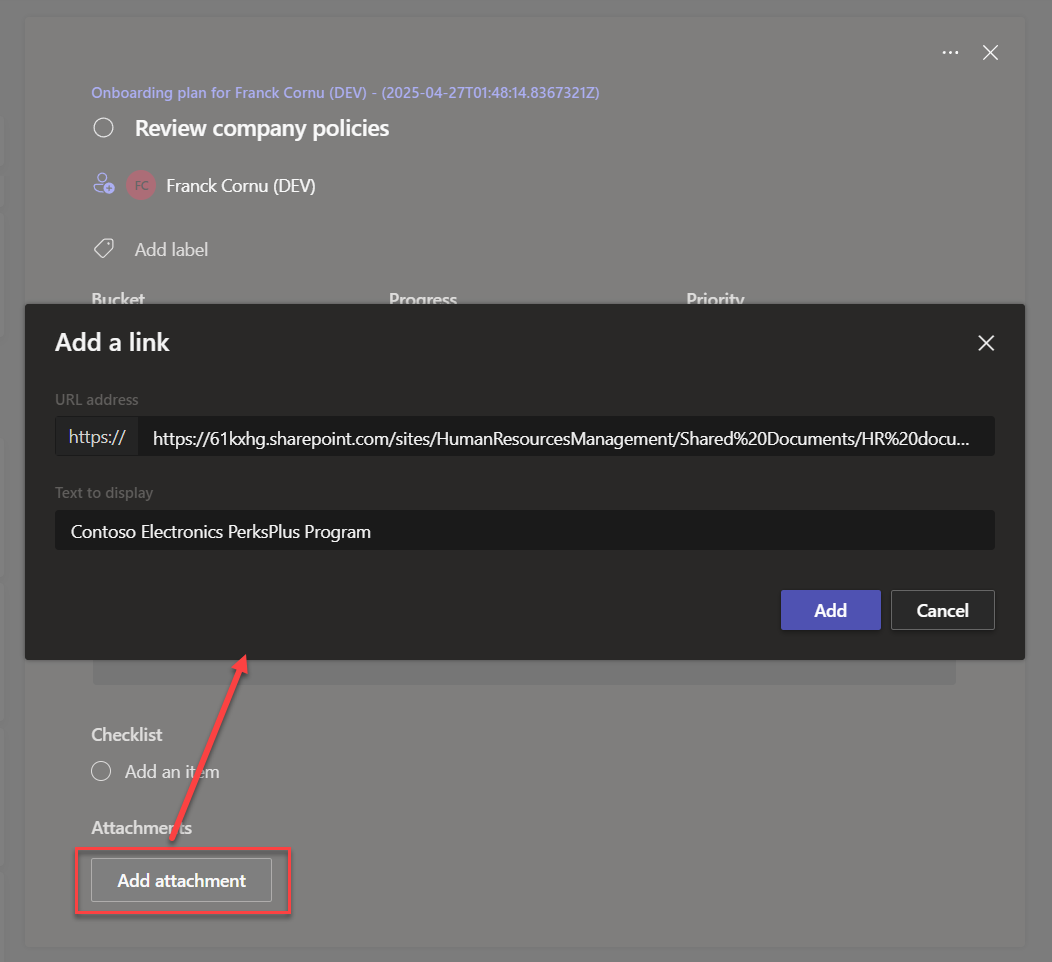
- In Microsoft Planner. go to the plan newly created for the user and link the Contoso Electronics PerksPlus Program.docx file to the 'Review company policies' task:
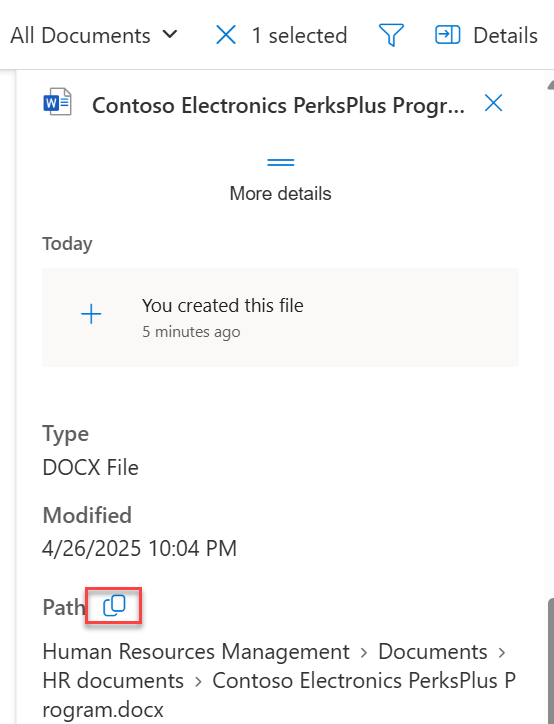
To get the absolute path of a file in a SharePoint library, select the document item, open the 'Details' pane and copy the value:
You are now ready to test the agent locally from Visual Studio Code and Teams Toolkit!cd